How to Degrease Kitchen Cabinets and Backsplash Without Stripping the Finish
Cooking grease does not stay near the stove. It rises on steam, settles on cabinet doors, and builds an almost-invisible film on backsplashes until the day you realize your kitchen looks tired no matter how much you wipe the counters. The good news: you can cut through that film without stripping paint, lifting laminate, or dulling tile glaze. The trick is matching the cleaner to the surface and using the two-cloth method that lifts grease instead of pushing it around.
Every time you sear a steak, fry bacon, or even boil pasta water, a fine mist of oil and water vapor leaves the pan and looks for a place to land. The closest horizontal surface wins. Over weeks, that mist becomes a tacky, amber-tinged layer that ordinary all-purpose spray cannot quite erase. If you have ever sprayed a cabinet door and ended up with streaks that look worse than the original mess, you already know the frustration. The problem is usually not the elbow grease; it is the chemistry and the cloth.
This guide is for the real cabinets most of us own: painted wood, stained wood, laminate, thermofoil, and the occasional vintage veneer. It also covers the backsplash materials behind them — ceramic tile, glass, painted drywall, and stainless steel. We will walk through identifying the finish, choosing a safe degreaser, applying it with the two-cloth technique, and finishing with a rinse that leaves the surface clean but not soaked. No harsh fumes, no stripped finish, no surprise damage.
Why Cabinet and Backsplash Grease Is Different From Countertop Grime
Countertop messes are fresh. A tomato seed, a flour dusting, or a coffee ring sits on top of the sealant and wipes away. Cabinet grease is cooked-on. Heat polymerizes the oil, which means the film has chemically bonded to itself and is grabbing onto the finish beneath it. The longer it sits, the more it behaves like a soft varnish rather than a liquid. That is why a damp rag just smears it, and why aggressive scrubbing can scar the surface underneath.
Backsplashes catch the same film, but the surface is usually harder and more vertical. Gravity helps, so the buildup is thinner but more widespread. Tile grout, however, is porous. Once grease works its way into grout lines, the whole wall can look dingy even when the tiles themselves are clean. Understanding this difference matters because the same cleaner that is safe on glazed tile may be too strong for painted cabinets, and the tool that works on grout can scratch cabinet doors.
Identify Your Cabinet Finish Before You Choose a Cleaner
Five minutes of inspection prevents a five-hundred-dollar refinishing bill.
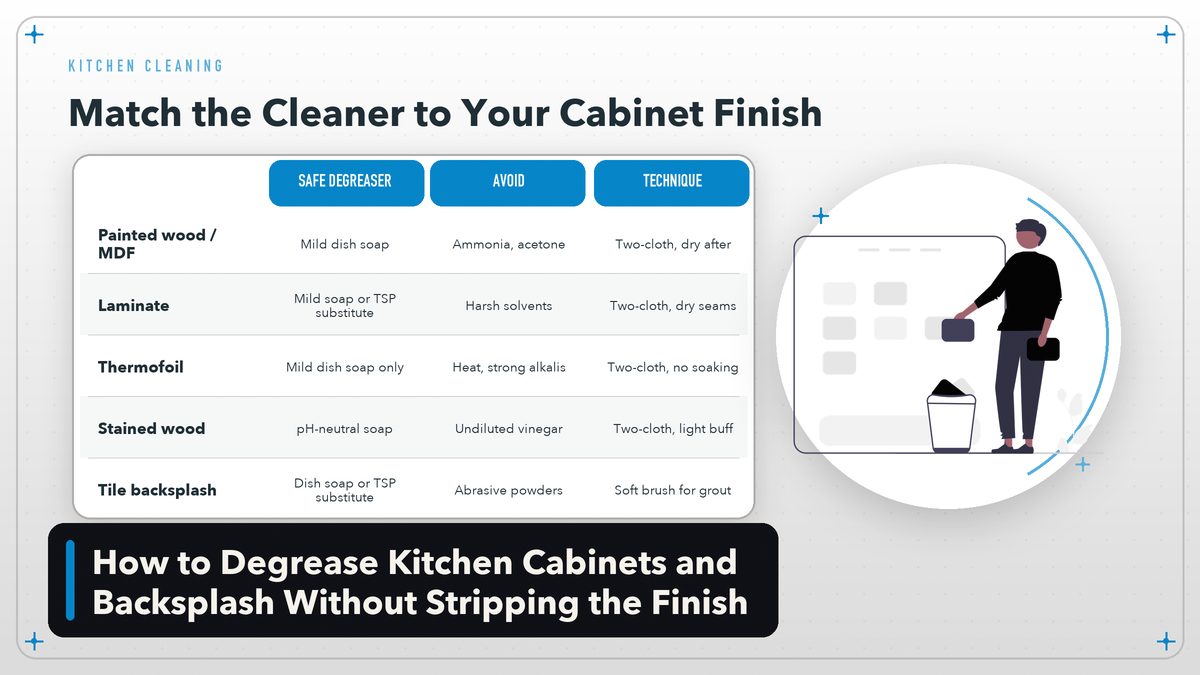
The first rule of cleaning kitchen cabinets is to know what you are cleaning. A degreaser that is perfectly safe on a factory-cured painted door can ruin an older lacquer finish or make thermofoil edges peel. Open a cabinet door and look at the edge or the back panel. Then match what you see to the list below.
| Finish type | How to recognize it | What to avoid |
|---|---|---|
| Painted wood or MDF | Smooth, opaque color; may show brush marks on older doors. | Abrasive powders, ammonia, acetone, excessive water near seams. |
| Stained wood with clear coat | Wood grain visible; surface feels slightly warm or glossy. | Silicone-based sprays, undiluted vinegar, magic erasers. |
| Laminate | Thin colored layer over particleboard; seams at edges. | Harsh solvents, nail polish remover, steam cleaners. |
| Thermofoil / vinyl wrap | Seamless, slightly flexible covering; common on white IKEA-style doors. | Heat, strong alkaline cleaners, acetone — can delaminate the wrap. |
| Raw or oiled wood | Wood feels dry, absorbs water spots, uncommon in modern kitchens. | Water-based degreasers; use a specialist wood cleaner instead. |
If you are unsure, test any cleaner on the inside of a door or the back of a drawer front first. Dab a small amount, wait ten minutes, and look for clouding, stickiness, or color lift. The test spot should feel exactly like the surrounding area once it dries. When in doubt, use the gentlest option that still cuts grease.
Choose the Right Degreaser for the Job
The word “degreaser” covers a wide range of products, from a squirt of dish soap to heavy-duty alkaline sprays. For kitchen cabinets and backsplashes, the safest and most effective choice is usually a pH-neutral or mildly alkaline cleaner with a surfactant strong enough to break the bond between the oil and the surface. Surfactants let water mix with oil so the grease can be carried away. Without a surfactant, you are just moving grease around.
The gentlest option: dish soap and warm water
A few drops of a quality dish soap in a gallon of warm water is the cabinet cleaner I reach for first. Dish soap is formulated to cut animal and vegetable fats, which is exactly what cooking grease is. It is pH-neutral, inexpensive, and safe on every finish listed above except raw wood. The downside is that it requires a little more contact time and a good rinse cloth, but that trade-off is worth it for the safety margin.
The middle ground: TSP substitute
Trisodium phosphate, or TSP, is the old-school cleaner contractors used before painting because it strips grease like nothing else. It also strips finish and is harsh on skin and waterways. A Safer Choice-certified TSP substitute gives you similar lifting power without the phosphate. These products are excellent for painted cabinets and backsplashes that have not been cleaned in a year or more. Follow the dilution on the label, wear gloves, and keep the solution away from thermofoil edges.
The heavy-duty option: commercial degreasing sprays
For severe buildup — the kind that feels slightly sticky and turns a paper towel yellow — a commercial kitchen degreaser can save time. Look for one that says “safe for cabinets” or “non-corrosive.” Avoid anything with acetone, methylene chloride, or undiluted ammonia. Spray onto the cloth first, not the cabinet, and work in small sections so the product does not dry on the surface.
What about vinegar?
Vinegar is a popular natural cleaner, and it does cut alkaline residues like hard water. But it is an acid, and repeated use on wood finishes, stone, or painted surfaces can dull the sheen over time. I use vinegar only on glass backsplashes and stainless steel, diluted half-and-half with water, and I rinse it off quickly. I do not use it as my main cabinet degreaser. The Michigan State University Extension recommends mild detergent solutions over vinegar for routine cabinet care because they are less likely to damage finishes.
The Two-Cloth Method: Lift Grease Instead of Spreading It
This is the technique that makes the difference between a kitchen that looks clean for an hour and one that stays clean for weeks. You need two microfiber cloths and a bucket or bowl of your chosen cleaning solution. Microfiber is important because its fibers are fine enough to grab grease particles rather than just pushing them. Paper towels and cotton rags tend to redeposit grease.
Cloth one is the wet cleaner. Dip it in the solution, wring it out until it is damp but not dripping, and wipe a small section — about the size of a cabinet door — using a circular motion. Work from the top of the cabinet down so drips do not run over already-clean areas. Flip the cloth to a clean side as soon as you see yellowing or streaking. When both sides are loaded with grease, rinse and wring the cloth out.
Cloth two is the rinse and dry. After the section has been cleaned, go over it with a clean, damp microfiber cloth dipped in plain water. This removes the surfactant residue. Then immediately follow with a dry microfiber towel to remove standing water. Seams and edges are where water does the most damage, so pay special attention there.
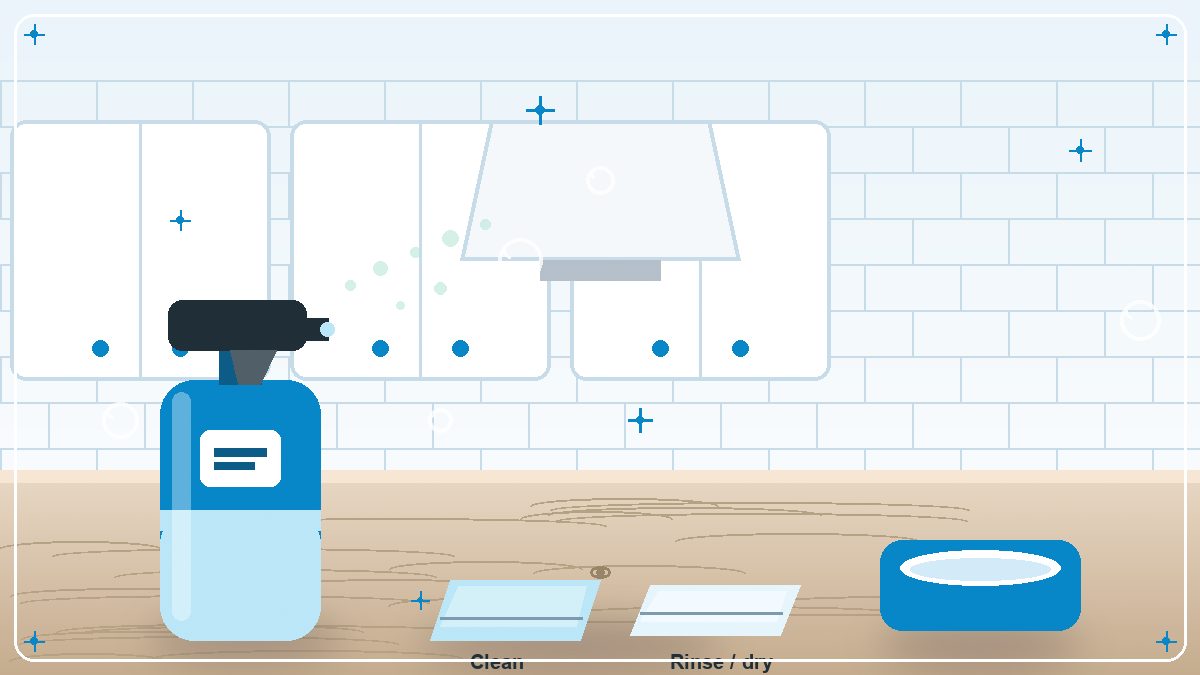
The two-cloth method is simple: one cloth applies the cleaner and carries the grease away, the second cloth removes the residue before it dries.
Why does this matter? If you leave cleaner residue on the surface, it attracts new dust and grease, and within days the cabinet looks hazy again. The rinse step is what breaks that cycle. It takes a few extra minutes, but it is the difference between cleaning every month and cleaning every season.
Step-by-Step: Degreasing Kitchen Cabinets
Start with the upper cabinets because grease and dust settle downward. If you clean the lower cabinets first, you will just dirty them again when drips fall from above. Remove small items from the counters so they do not get splashed, and lay a towel along the backsplash edge to catch drips.
- Step 1: Dust first. Run a dry microfiber cloth or a soft duster over the cabinet faces, tops, and handles. Dust mixed with grease becomes abrasive mud.
- Step 2: Prepare your solution. For routine maintenance, mix a few drops of dish soap in warm water. For heavy buildup, use a TSP substitute diluted to the “general cleaning” strength on the label.
- Step 3: Work in small sections. Start at the top corner of one upper cabinet. Wipe with the damp cleaning cloth, then rinse with the second cloth, then dry immediately.
- Step 4: Clean hardware and handles. These touchpoints collect hand oils on top of cooking grease. A soft toothbrush dipped in the solution works well around hinges and pulls. Dry immediately.
- Step 5: Hit the cabinet tops. The flat top of upper cabinets is the most forgotten surface in the kitchen. It is also where the worst grease-dust mixture lives. Stand on a sturdy step stool and wipe it clean.
- Step 6: Inspect in raking light. Turn on a flashlight or open a window so light skims across the cabinet face at an angle. Streaks you cannot see head-on become obvious.
- Step 7: Touch up stubborn spots. For a small patch of thick grease, lay a cloth soaked in warm soapy water over the spot for two minutes to soften it, then wipe gently.
Painted cabinets may need a second pass, especially around the range hood where the heaviest grease lands. Do not scrub harder; instead, let the cleaner sit for a minute longer, then repeat the two-cloth sequence.
Step-by-Step: Degreasing the Backsplash
Backsplashes are easier than cabinets in one way — the surfaces are harder — but they come with their own challenges. Grout lines, silicone caulk, and decorative textures can trap grease. The approach depends on the material.
Glazed ceramic or porcelain tile
These are the most forgiving. Use the same dish-soap solution or TSP substitute you used on the cabinets. Wipe the tiles first, then use a soft grout brush or an old toothbrush on the grout lines. The two-cloth method still applies: rinse with plain water and dry to prevent water spots.
Glass tile or glass sheet backsplash
Glass shows every streak, so a final wipe with a glass cleaner or a half-vinegar, half-water solution followed by a dry microfiber cloth gives the best finish. Clean the glass with soapy water first to remove the grease, then do the vinegar rinse only for the final polish.
Painted drywall backsplash
This is the most delicate. Painted walls are not designed to be scrubbed repeatedly. Use the weakest solution — barely sudsy water — and a barely damp cloth. Blot rather than scrub. If paint starts to look chalky or color transfers to your cloth, stop immediately. You may be approaching the point where cleaning turns into paint removal.
Stainless steel backsplash or range hood
Stainless steel can handle a dedicated stainless cleaner or a mild degreaser, but always wipe with the grain to avoid visible scratches. The University of Georgia Extension emphasizes that removing organic soil, including grease, is a necessary step before any disinfectant can work effectively on household surfaces. In the kitchen, that means degrease first, sanitize second if needed.
What to Do About the Really Stubborn Areas
Every kitchen has one or two spots that seem immune to normal cleaning. Usually these are directly above the stove, around the range hood filter, or on the sides of upper cabinets near a frequently used pan. Here is how to handle them without reaching for something that will damage the finish.
For thick, amber grease above the stove, apply a paste of baking soda and a little dish soap. The baking soda is a mild abrasive that provides gentle scrubbing power without the scratch risk of a powder cleanser. Spread the paste over the spot, let it sit for five to ten minutes, then wipe with a damp microfiber cloth using light pressure. Rinse and dry. This works on painted cabinets, laminate, and tile. Avoid it on raw wood or high-gloss lacquer where micro-scratches could show.
For range hoods and filters, remove the filter if possible and soak it in hot water with dish soap and a quarter cup of baking soda. The grease will loosen within fifteen to twenty minutes. Rinse under hot water, let it dry completely, and reinstall. A clean filter moves air better, which means less grease lands on your cabinets in the first place.
For yellowed cabinet edges or corners, the discoloration may be oxidized finish rather than grease. Test with a cotton swab dipped in a tiny amount of TSP substitute. If the yellow lifts easily, it is grease. If the area becomes tacky or the color changes, it is finish damage and no amount of cleaning will fix it.
Protecting the Finish After You Clean
Cleaning removes the grease, but it can also strip away the very thin layer of oils or waxes that gives some finishes their luster. After a deep clean, it is worth taking one extra protective step depending on the material.
For stained wood cabinets with a clear finish, a small amount of cabinet-grade conditioning polish — the kind recommended by the manufacturer, not a furniture spray loaded with silicone — can restore depth. Apply it sparingly with a soft cloth, buff gently, and wipe away any excess. A little goes a long way.
For painted cabinets, a thin coat of paste wax or a cabinet-specific protectant can make the next cleaning easier. The wax fills microscopic pores so grease sits on top rather than bonding. This is especially useful for matte or satin painted doors near the stove.
For laminate and thermofoil, protection is mostly about prevention. Keep the range hood filter clean, use a splatter screen when frying, and wipe splashes the same day. These surfaces do not need polish, and polish can sometimes make them look cloudy.
Build a Maintenance Schedule So Grease Never Wins Again
The easiest way to avoid another deep degreasing session is to prevent the film from building in the first place. A five-minute weekly wipe-down is far less work than a three-hour deep clean every six months. Here is the schedule that works in my kitchen.
- After every cooking session: Wipe the backsplash and the front of the range with a damp microfiber cloth while the surface is still warm. Warm grease wipes away easily; cold grease does not.
- Weekly: Run a barely damp cloth over cabinet faces, especially the ones closest to the stove. This is also a good time to clean the range hood filter if you cook often.
- Monthly: Do a more thorough wipe of cabinet fronts and handles using the two-cloth method. Inspect the tops of upper cabinets and the sides of cabinets near the cooktop.
- Seasonally: Deep clean using the full process in this guide. Spring and fall are natural times because the weather is mild enough to open windows for ventilation.
After cooking
— Wipe backsplash and range while warm; fresh grease wipes away easily.
Weekly
— Barely damp cloth over cabinet faces closest to the stove; check range hood filter.
Monthly
— Two-cloth wipe of cabinet fronts, handles, and tops.
Seasonally
— Full deep clean with finish-matched degreaser and protectant.
A five-minute wipe after cooking saves you from a weekend of scrubbing later. Grease is always easier to remove when it is fresh.
If you fry foods regularly or cook without a range hood, tighten the schedule. If you mostly use the microwave and oven, you can stretch it. The key is consistency, not perfection. A thin layer that is removed often never gets the chance to polymerize into that stubborn varnish.
Common Mistakes That Damage Cabinets and Backsplashes
Even with the right cleaner, the wrong technique can cause problems. These are the mistakes I see most often.
Using too much water. Cabinets are not boats. Water that seeps into seams, edges, or hardware holes can swell particleboard and lift laminate. Your cloth should feel damp, not wet.
Scrubbing with abrasive pads. Scotch-Brite pads and magic erasers are abrasives. They will remove grease, but they will also remove finish. Use them only on glass or stainless steel, and even then with care.
Spraying cleaner directly on the surface. Overspray lands on countertops, floors, and adjacent appliances. It also increases the chance of the cleaner running into seams. Spray onto the cloth first.
Ignoring the range hood. A clogged filter does not move grease outside; it dumps it onto the cabinets. Cleaning the filter is part of cleaning the cabinets.
Using all-purpose spray as a one-step solution. Many all-purpose cleaners leave a film that attracts dust. If your cabinets look hazy a day after cleaning, residue is the likely culprit. Rinse with plain water.
When to Call a Professional
Most cabinet and backsplash cleaning is a DIY job, but there are times when professional help makes sense. If the finish is already peeling, bubbling, or cracked, cleaning will expose more damage. A refinisher can address the underlying issue before you maintain the surface. Likewise, if grease has penetrated deeply into porous stone or unsealed grout, a tile and grout professional may have extraction tools that household cleaning cannot match.
Smoke damage from a kitchen fire is another case where DIY is not enough. The residue is chemically different from cooking grease and can be hazardous. Hire a restoration company with experience in smoke and soot removal.
Final Checklist for Your Next Cabinet-and-Backsplash Deep Clean
Before you put away the bucket, run through this quick checklist. It ensures you did not miss the spots that make the biggest visual difference.
- Upper cabinets first, lower cabinets second. Gravity is not your friend if you reverse the order.
- Match the cleaner to the finish. When unsure, start with mild dish soap and water.
- Use two microfiber cloths. One for cleaning, one for rinsing and drying.
- Clean the range hood filter. Soak it in hot soapy water with baking soda.
- Rinse backsplashes thoroughly. Grout and glass show residue more than cabinets.
- Dry seams and edges immediately. Water damage starts at the edges.
- Inspect in raking light. Streaks hide in normal overhead lighting.
- Protect after deep cleaning. A light polish or wax on wood makes the next job easier.
Keeping a kitchen looking fresh is less about having the strongest cleaner and more about having the right process. Choose a degreaser that matches your finish, use the two-cloth method, and clean often enough that grease never gets the chance to bake on. Your cabinets will keep their color, your backsplash will keep its shine, and you will spend far less time scrubbing on weekends.
Sources and related reading: External guidance from the EPA Safer Choice program, University of Georgia Extension household cleaning guidance, Michigan State University Extension, KraftMaid cabinet care, and Merillat cabinet care. For more kitchen cleaning guides, see our articles on deep-cleaning the kitchen step by step and cleaning a greasy oven without harsh fumes.